LearnDash MailChimp
Documentation
The LearnDash – MailChimp plugin is designed to make communicating with LearnDash students both easier and more efficient. This is accomplished by enabling MailChimp subscription functionality during the course enrollment process and also by segmenting those students according to the courses they enroll in.
Settings
To enable automatic updates and premium support, navigate to LearnDash LMS – > Settings – > Mailchimp -> Licensing and activate your license key (which you can find on your purchase history page)
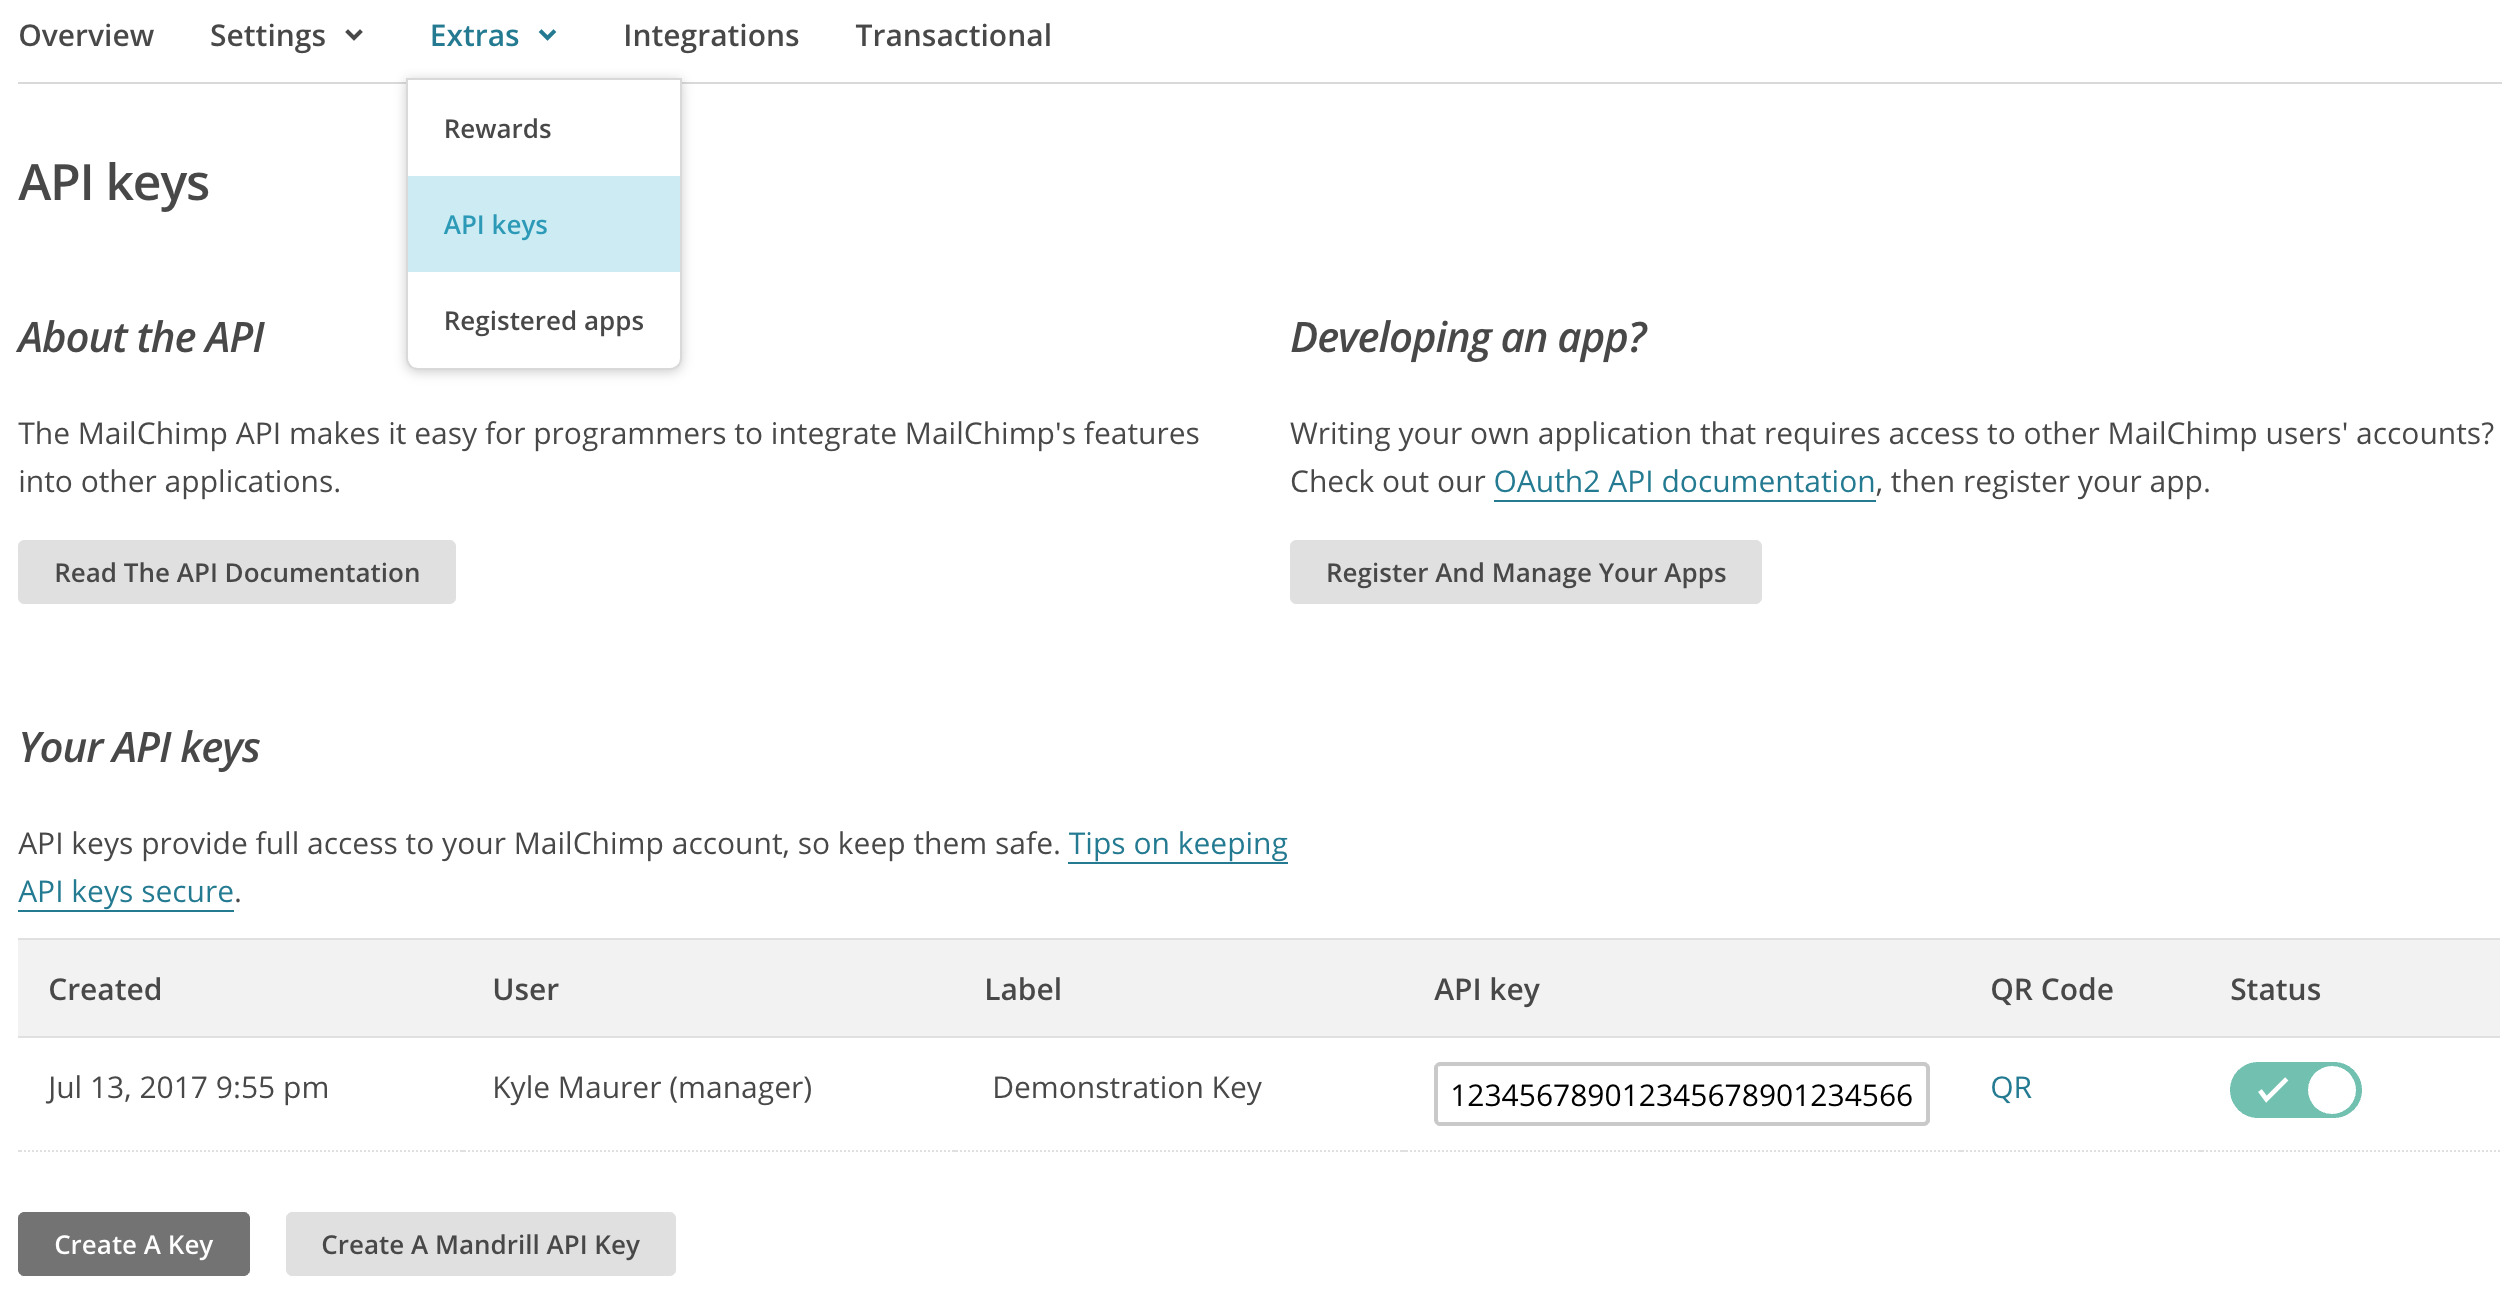
To get started using LearnDash – MailChimp, it is first necessary to obtain an API key from within your MailChimp account. To get this, login to your account at mailchimp.com, then proceed to Account – > Extras – > API Keys. Clicking on the Create A Key button will generate a new API key which you will copy and enter into the LearnDash – MailChimp settings.
MailChimp API Keys Settings
WARNING: If you have configured the First and Last Name fields to be required under Audience -> Manage Audience -> Settings -> Audience fields and *|MERGE|* tags then you will need to ensure that all Users registered to your WordPress site have a First and Last Name saved. If they do not, LearnDash Mailchimp will fail to add them to your List. You can often configure these fields to be required in your User Registration workflow on your website (WooCommerce, EDD, Gravity Forms, your Theme, etc.). Making these required on your WordPress site is only required if they are marked as required in your Mailchimp List.

Once you have obtained your API key from MailChimp, login to your WordPress site where the LearnDash – MailChimp extension is installed and navigate to LearnDash LMS – > Settings – > MailChimp. There you will see a text field which is patiently waiting for your new API key. Paste it into that field and hit the Save Changes button.

After you have saved your API key, if the key is valid, you will see a “Valid API key” message and a select field for choosing your list. Select a list and then hit Save Changes again. This time, if you have existing courses, you should see a Create Segments button. When you hit this button, MailChimp segments will be created within your list which correspond with each existing course on your site.

The next settings on this page are the Registration subscribe and success message field. These options allow you to set the text shown to prospective students before and after they subscribe to a list.
You will also see a toggle switch for enabling Auto-Subscription of Students. This renders the Message fields unused and will instead handle all subscriptions in the background automatically on enrollment.
If Auto-Subscription is turned on, a button will appear which will allow you to auto-subscribe all current and past students already existing on your site.
The final button operates as a sort of “uninstall” button. This will delete the Tags created in MailChimp for your Courses and will delete the saved Tag on the WordPress-side for each Course.
Enabling Subscription Form
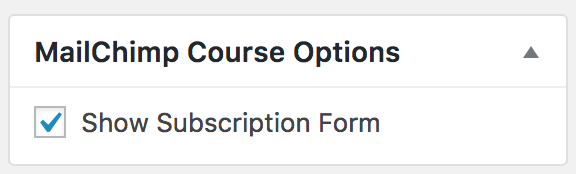
In order to enable the subscription form for a course, edit the course and check the Show Subscription Form box on the right side of the screen. This will not show if you have Auto-Subscription enabled as the Subscription Form is not required under these circumstances.
Shortcode
The LearnDash – MailChimp plugin includes a shortcode which allows a subscription button to be displayed within content anywhere on your site. To use this shortcode, enter the following within the contents of any page or post:
[ld_mailchimp course_id=”123″]
To make this work on your site, edit a course from the site dashboard and you will see the ID number of that course in the page’s URL. Enter that number in place of the 123 above in order to associate the subscription button with the correct course.
Important Notes
When using the LearnDash – MailChimp extension, there are a few important facts to remember.
The subscription form will only appear for logged in users
Visitors to your site will not see a subscription form until they login. If they do not yet have a user account they will need to register for one before seeing any MailChimp subscription features.
MailChimp does not always show segment subscribers immediately
If you are testing the segmentation functionality or have users subscribing and login to MailChimp to verify that the subscribers are being added to the right list segment, do not be surprised if they are not there initially. Please wait at least an hour to be sure.